Quantcast
Channel: Sarvyoga | Yoga
Viewing all 364 articles
Browse latest View live

Utthan Pristhasana (Lizard Pose)

$
0
0

Utthan-Pristhasana-Lizard-Pose-yoga-pose-steps
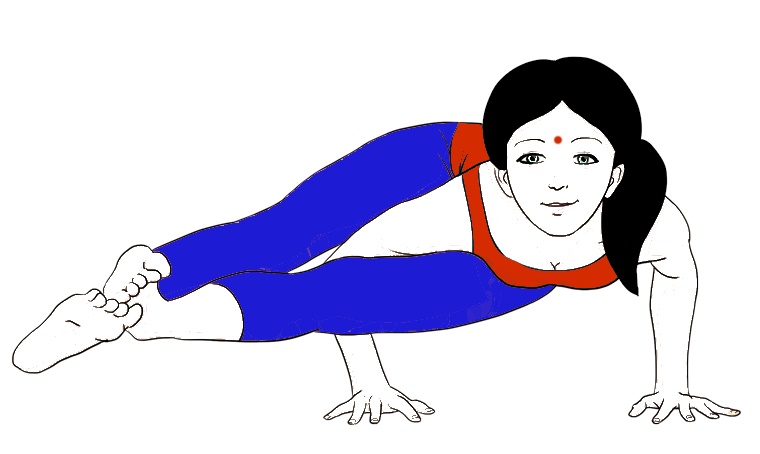
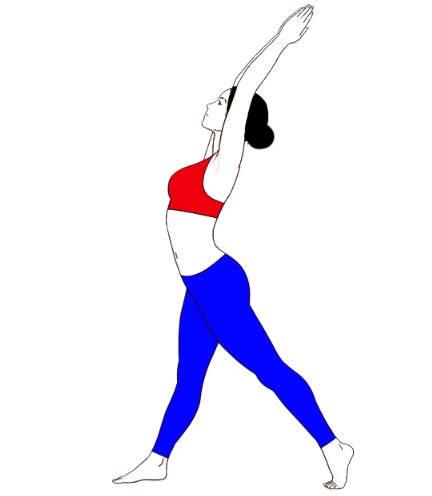
Utthan Pristhasana is made from the two combinations “Utthan Pristha”; and it is a Sanskrit word. In this Utthan stands for stretch out and the meaning of Pristha is the page of a book or Back of the body and Asana represents seat, pose or posture. While performing this pose, your body looks like the position of the Lizard. So that’s why this pose is called Lizard pose. It is a simple to do asana for learners and this Yoga pose is one of the vital poses in the Surya Namaskar (Sun Salutation). Utthan Pristhasana opens your chest, shoulders, and Hip and it has many variations.

Lizard Pose is a basic level Yoga Pose that stretches and strengthens your inner hamstrings, groin.

Steps of UTTHAN PRISTHASANA (LIZARD POSE)

  • First get into the position of Adho Mukha Svanasana (Downward facing dog pose) on the floor or yoga mat.
  • Keep your right foot in between your hands, your foot is little wider than your shoulders (for this place your foot heel-toe in the direction of the edge of the yoga mats).
  • After that, keep your hips towards forward and down.
  • Then, gently walk towards to your hands until it comes down onto your forearms. Now place your forearms on the floor along with keeping your chest open.
  • Now, slowly lengthens your spine and draw your shoulder blades together out of your back.
  • Place your right knee towards the middle line and look straight.
  • Maintain the pose around 30 to 60 seconds. After that release your position.
  • Repeat the same process with your alternate leg. Try to repeat the pose 3 times with your both legs; this will give you better output (result).
  • By practicing Utthan Pristhasana at least thrice (by both sides) will bring the better results.

You can use a block or folded blanket for support and keep your forearm on this block. In Any yoga Asana please focus on your breathing. You can also place your leg in between your hands, instead of your forearms side. You can also let down your left knee for support to the floor if you are uncomfortable.

BENEFITS OF LIZARD POSE (UTTHAN PRISTHASANA)

  • Utthan Pristhasana opens your chest, shoulders, hip flexors, groins, and hamstrings.
  • Calms your mind and best stress buster.
  • Helps to open the hamstrings, hip flexors, and groins.
  • Lizard Pose Makes your inner thigh muscles and quadriceps stronger.
  • Good for your neck; it gently massages your internal organs.
  • Lizard Pose is a simple Asana but very effective for your body, mind and soul.
  • This Yoga pose is very good for your hip opening.

NOTE

In the condition of lower back pain, sciatica, forearm pain avoids this Asana. Try to practice all the Yoga Asana in the morning with empty stomach. Guidance is necessary for all the Asana, so perform all the yogic activities in front of the expert trainer.

While practicing listen to your body, and don’t go beyond over your capabilities.

(You have only one life; it’s all up to your make it or destroys it. Embrace the yoga as your lifestyle. This is not costing you but gives you a lot in term of mind, body, and soul. In Yoga daily practice is the most important thing, so practice regularly for better results).

The post Utthan Pristhasana (Lizard Pose) appeared first on Sarvyoga| yoga online|yoga.


Extended Hand-to-Big-Toe Pose (Utthita Hasta Padangusthasana)

$
0
0

Extended-Hand-to-Big-Toe-Pose-Utthita-Hasta-Padangusthasana-yoga-stepsUtthita Hasta Padangusthasana needs more flexibility in legs, so before performing this Asana, try other basic leg stretching Poses first. In this pose, you have to raise your leg in forwarding direction or to your hand’s side direction and grab the thumb of your foot and maintain the balance. Utthita Hasta Padangusthasana is a Sanskrit word; in which Utthita stands for extended, Pada represents your foot and the meaning of Angustha is a Big toe. This Yoga Pose is well known as Extended Hand – to- Big – Toe Pose. It gives heat and expansion to your body.

Preparatory Poses

Supta Virasana, Uttanasana, Supta Padangusthasana

Follow-up Poses

Bhujangasana (Cobra Pose), Adho Mukha Svanasana, Uttanasana

Level of Asana: – Intermediate

Steps of Utthita Hasta Padangusthasana

  • First get into the position of Tadasana, keep your left knee in the direction of your belly.
  • Now reach your left arm inward to your thigh and cross it over your front ankle. After doing this you have to hold the outside of your left foot (If you have tight hamstrings then hold a strap loop around your left sole).
  • Keep your front thigh muscles of your standing leg strong along with keeping your outer thigh in an inward direction.
  • Breathe in and expand your left leg forward.
  • Now, you have to straighten your knee as much as you can. After that swing your left leg out to the side. Breathe normally and try to maintain your balance. Breathing helps you to balance.
  • Remain in the pose around 30 seconds; breath out and down your leg to the floor. Repeat the same process with your alternate leg.

Extended Hand-to-Big-Toe Pose Yoga Tips for Beginners

You can use the support of chair back for placing your raised leg foot on the top edge of a chair.

Benefits of Utthita Hasta Padangusthasana

  • Extended Hand-to-Big-Toe Pose strengthens your ankles and legs along with stretches the backs of your legs.
  • Stretches your adductor muscles of your raised leg and hamstrings also.
  • This Yoga Pose is good for your core.
  • Utthita Hasta Padangusthasana is Beneficial for your nervous system.

NOTE

In the condition of ankle injuries, feet and legs pain then avoid this Pose. If you are feeling instability in the hip region also avoid Extended Hand-to-Big-Toe Pose People you are suffering from vertigo and balance issues then don’t perform this Pose.

(Eat Healthy Live Well)

The post Extended Hand-to-Big-Toe Pose (Utthita Hasta Padangusthasana) appeared first on Sarvyoga| yoga online|yoga.

Ardha Bhekasana (Half Frog Pose)

$
0
0

Ardha+Bhekasana, in this Ardha mean half and the meaning of Bheka is the frog. Ardha Bhekasana is an intense pose, which deeply opens your groin and when you are performing this pose your body posture resembles the pose of a frog, so this Yoga Pose named so. It is also known as Eka Pada Bhekasana (One- Legged Frog pose).

Ardha Bhekasana is very helpful for those who are restricted from dancing, running or walking long distance coz of flat feet. It reduces the risk of knee injuries when it practiced daily and beneficial for those people who are busy in outdoor activities and sports.

Preparatory Yoga Poses

Shalabhasana (Locust Pose), Bhujangasana (Cobra Pose), Supta Virasana (Reclined Hero Pose), Setu Bandha Sarvangasana, Virasana.

Follow – Up Yoga Poses

Eagle Pose (Garudasana), Downward Facing Dog Pose (Adho Mukha Svanasana).

Steps of Ardha Bhekasana (Half Frog Pose)

  • Lie Down on your belly (stomach) on your forearms and place your elbows below the shoulders.
  • Now, sturdy your pubic bone downs along withdraw your belly in.
  • After that, cross your left forearm in front of the body.
  • Then, bend your right knee towards your back and try to grab the top of your foot by your right hand. During this, gently pulls your foot in towards the outside of your right hip area.
  • Try to soften the top of your right thigh, turn your fingers towards the front if you can and turn your right side body in forwarding direction (look forward).
  • Keep breathing normally and hold the pose for 5 breaths before you discharge the pose. After 5 or 6 breathe release your foot and gently lower down it to the floor, rest for a while and perform the same process with your alternate leg.

Benefits of Ardha Bhekasana

  • Ardha Bhekasana stretches your hip flexors and thigh muscles also.
  • Strengthens and increases your back flexibility.
  • Half Frog Pose is a good chest and shoulders opener.
  • Boosts your energy level and prepare your body for back bending poses.
  • Best Asana for cyclists, runner, dancers and those who are busy in outdoor sports.

(Full frog Pose is the intermediate level or variations of Half Frog Pose, in this, you have to bend your both knees and both feet to the corresponding to your buttocks. Try to grab the both feet by your hands towards the floor or try to touch in there). For doing this, you have to master in the basic level of the Ardha Bhekasana.

Half Frog Pose Tips for Beginner’s

If you find some difficulties during lift up your torso using one hand, in this condition you may use bid pillow under your lower rib for support to lift your torso up.

NOTE

People who are facing high or low B.P., insomnia, lower back or neck pain, migraine and shoulder injuries do not perform this. Don’t press your knee too hard otherwise, it will hurt your knee. Keep your neck in relaxed position. During this pose, you feel the stretch in the stomach region, thigh muscles but not around the knee joint.  Asana, Pranayama needs guidance, so practice all the yogic activities in under the supervision of an expert teacher. Perform all the Asana in a right manner.

Before doing Any yoga poses, you have to master in the preparatory and Follow –up poses.

(Don’t spoil your life in smoking and drinking, guys there are much more things to do. You have only one life, your life is not a video game in which you have three chances. So make your life healthier, happier by Yoga)

The post Ardha Bhekasana (Half Frog Pose) appeared first on Sarvyoga| yoga online|yoga.

Yoga Teacher Training in India – A Complete Guide

$
0
0

In the post find complete details about yoga teacher training in India. Hatha Yoga, Ashtanga Yoga etc. How to find the best yoga school in India you can also solve these queries here.

India is the place of Rishis and Sages of the time past, and birthplace of yoga. From India, the light of yoga is spread all over the world by this world celebrated International yoga day. In Ancient time Yoga is a part of daily routine. People gain the knowledge of Purna.

However, it would not be wrong to state that India still maintains its legacy of being the pioneer of Yogic practices. India being the place of origin of Yoga and related practices continue to be a hub of the Yogic culture in the world. As wide as the expanse of its impact on potential Yoga learners is, the scope of the teaching of Yoga is also catching up a great deal in India. With the upswell in the number of Yoga teachers in India, there are an exuberant number of schools itself that cater to the need of Yoga Teacher Training India.

People gain the knowledge of Purana, Upanishads by Rishis along with Yoga in Ashram or Gurukul. These Indian Rishis revealed the knowledge of yoga. It was promulgated by sages such as Maharishi Patanjali, Guru Matsyendranath, and Guru Gorakhnath. But Shri Tirumalai Krishnamacharya known as the father of modern yoga and then term come Yoga Teacher Training in India.

Shri Tirumalai Krishnamacharya is accepted to have grown a large portion of the imperative styles of Yoga practised in the twentieth century. And is particularly accepted to have developed the Vinyasa style. His legacy has given the world such fine instructors as BKS Iyengar, K Pattabhi Jois, BNS Iyengar and TKV Desikachar.

Here is the famous quote “Krishnamacharya’s Legacy”, sums up best the influence Krishnamacharya has had on modern Yoga:

Whether you practice the dynamic series of Pattabhi Jois, the refined alignments of B.K.S. Iyengar, the classical postures of Indra Devi, or the customised vinyasa of Viniyoga, your practice stems from one source: a five-foot, two-inch Brahmin born more than one hundred years ago in a small South Indian village.

For the practice of yoga, a professionally trained yoga teacher is needed. A trained yoga teacher gives the proper and accurate knowledge. So learners should practice yoga activities in under the expert or trained teacher.

India is the Best Place for Yoga Teacher Training

India addresses the concern of teaching Yoga in its duality- the body element and the mind element simultaneously. Since both are equally important facades, an individual looking forward to learning to teach Yoga gets to dive deep into the holistic Yoga vibe in India. It gives the potential teachers the wide array of chances to stage their Yogic talent and put it to use for benefiting the people in India itself. Further, what gives India the essential edge over various other countries with respect to teachers’ training is the fact that there is an abundance of teacher’s training schools to pick from. The courses designed are very flexible and pocket-friendly. Furthermore, the idea of Yoga Teachers’ Training is not new to India as it has been around for almost half a century in the country.

Experienced Trainers

Even today, some of the most experienced hands and minds at Yoga in the world are available here to disseminate this knowledge to India and the world. The yoga teachers trainers in India take Yoga to a more meaningful level by imparting their experiences that have seasoned them over decades. Being associated with training teachers for a long span of time, the future teachers of Yoga to the world can bank upon this opportunity to get a flavour of what the ACTUAL, ORIGINAL Yoga is all about. There can be no better place to learn these skills than India itself.

Learning an art is always preferred to be done at its place of origin. For India, Yoga is that Art that it will always take pride in for having its roots here and nurturing the skill with its perfect knowledge for centuries.

Yoga Teacher Training in India

Yoga Teacher Training in India

Yoga Teacher Training in India

Despite the fact that Yoga instructors and projects can be discovered everywhere throughout the world. India is the best place for yoga teacher training and yoga educator preparing, Rishikesh and Mysore are the two fundamental focuses of Yoga on the sub-landmass. Most genuine understudies of Yoga more often than not make journeys to these focuses of learning. Here we will the best yoga teacher training schools in India and Registered Yoga teacher training school in India with Yoga Alliance, the biggest registry of yoga educators and schools on the planet. On account of the ones that are not, they are generally perceived by the Government of India, in which case Yoga Alliance will more often than not granddad you in the event that you need to wind up an affirmed Yoga Alliance educator.

An educator’s system isn’t exactly a spot for investigation. The minute you venture on the mat, it’s to take in the groupings you’ll be instructing. Your day is packed with learning otherworldly messages, life structures, droning, sitting in contemplation and doing practicums. An educator confirmation program doesn’t permit many opportunities outside its curriculum there are times, it doesn’t permit you to appreciate yoga!

Famous & Old Yoga Teacher Training Schools in India

  1. Parmarth Niketan, Rishikesh
  2. Sivananda Yoga Vedanta Dhanwantari Ashram, Trivandrum
  3. Krishnamacharya Yoga Mandiram, Chennai
  4. Ashtanga Yoga Research Institute, Mysore
  5. Ramamani Iyengar Memorial Yoga Institute, Pune

New Yoga Schools List of India

These are the list of top and old yoga teacher training school in India. Although there are a lot of other yoga schools in India where the availability of admission is good and you can easily take admission in these schools.

Kranti Yoga Goa, Rishikesh Yoga Peeth, Yoga Vini Rishikesh, Shivayogapeeth Rishikesh, Tatvayoga Rishikesh, Trimurtiyoga, Patanjali yoga foundation, siddhiyoga, ecovillage etc

Note- The list of these teacher training school is taken from Google and other sources. 

The post Yoga Teacher Training in India – A Complete Guide appeared first on Sarvyoga| yoga online|yoga.

Upavistha Konasana (Wide Angle Seated Forward Bend)-Yoga Pose

$
0
0

Here is an intense leg stretching Yoga Pose, which is named as Upavistha Konasana and Wide Angle Seated Forward Bend pose in English. In which Upavistha means sitting, seated, Kona stands for Angle. In simple words, this Asana is forward bending with leg stretching. This Asana seems to like easy but doesn’t take it this pose easily. This yoga pose needs more stretching and flexibility in your legs.

It is a very important stance, coz this pose used in many seated bend and twists related Asana as a preparatory pose. If you are comfortable performing this pose, it means you can attempt other seated bend, leg stretching poses easily. There is no repetition for Wide Angle Seated Forward Bend pose and it’s very beneficial for your legs and spinal.

Style of Asana: – Hatha Yoga

Level of Asana: – Intermediate.

Preparatory Yoga Poses

Dandasana, Prasarita Padottanasana, Baddha Konasana, Supta Padangusthasana, Supta Baddha Konasana.

Follow-Up Yoga Poses

Bakasana, Gomukhasana, Baddha Konasana, Malasana, Siddhasana, Padmasana, Supta Padangusthasana 

Steps of Upavistha Konasana (Wide Angle Seated Forward Bend)

  • First, sit straight with your legs open in a way that they make 90- degree angle with your pelvis.
  • Now, keep your toes pointing up as you flex your feet and align your knees.
  • At that point, you feel curve in your lower back (for curve you may use prop; Place a firm cushion under your pelvis. The cushion gives your pelvis more stability to tilt forward).
  • Then, Keep your palms on the ground, behind your hips.
  • Take a long and deep breath in such a way that the sides of your body lift, by making a space in the spine.
  • Hang on for a few seconds if you feel a well stretch in your legs at that point.
  • Then, support your lower back and sucking your belly in, breathe out and fold.
  • Slowly place your hands in front of you. Stretch as much as you can, if you feel uneasy then stop. Breathe deep and long during holding the pose about 30 to 60 seconds.
  • Breathe out and slowly get back to your initial position.

(If you are performing Wide Angle Seated Forward Bend pose easily then go for variations by modifying the pose. On the off chance that you need to increase the extent, you should take the position, and reach for your huge toes (right to right and left to left) as you twist forward. Bolt your fingers around the toes and draw on the enormous toe as you lean in. Be that as it may, as you do Upavistha Konasana, you should likewise push through the base of the toes to keep the external and inward piece of your lower legs even. Twist your elbows on the sides, and lift them off the floor as your middle touches the ground.).

Benefits of Upavistha Konasana (Wide-Angle Seated Forward Bend)

  • Activates your core muscles and stretches your hamstrings.
  • This Yoga pose stimulates and toned your abdominal organs, makes your spine stronger.
  • It also stretches your adductor muscles of the groin.
  • Wide Angle Seated Forward Bend stretches the inside and back muscles of your legs and strengthens your vertebral columns.
  • Upavistha Konasana calms your mind and relaxes your body.
  • Helpful in arthritis and sciatica along with detoxifies your kidneys.

NOTE

Don’t perform this stance if you are facing problems related to hamstrings or groin. In the case of lower back injury and in the condition of pregnancy avoid this. Use folded blanket for sitting if you are facing lower back pain during this Wide Angle Seated Forward Bend pose. Stretch your legs wider as much as you can.

The post Upavistha Konasana (Wide Angle Seated Forward Bend)-Yoga Pose appeared first on Sarvyoga| yoga online|yoga.

Urdhva-Mukha Paschimottanasana (Upward Facing Intense Stretch Yoga Pose)

$
0
0

First of all, you have to know the meaning of this Asana. Urdhva – Upward, up, Raised, Mukha – face, Paschima – west, back, back of the body, Tana – stretched, Uttana– straightened, intense stretch and the meaning of Asana is seat, pose or posture. Upward Facing Intense Stretch Pose is very much similar to Ubhaya Padangusthasana, but the difference is the stretch level. It improves blood circulation from head to toe and lengthens your entire backside. Best pose for kids for increasing their height. It is a very intense stretch Asana, so before doing Upward Facing Intense Stretch Pose perform the simple Paschimottanasana for increasing the stretch.

Preparatory Poses

Navasana (Boat Pose), Janu Sirsasana, Paschimottanasana, Uttanasana

Steps of Urdhva-Mukha Paschimottanasana

  • Start the Asana by sitting in the Dandasana (Staff Pose), after that lay down gently on the floor.
  • Breathe in and raise your arms to overhead. Breathe out and raise your legs straight off the floor.
  • Lift up your hips and take your feet to the hands, grab your big foot toe or the sole.
  • Inhale and keep your spine straight (during the process, it’s important that your spine should be erect).
  • Exhale, curl in and roll forward to maintain the balance.
  • Breathe in, as you balance well, set your eyes upwards (gaze upward).
  • Breathe out, fold your midsection (torso) to the legs (completely try to touch your torso to your legs, same as in Paschimottanasana). Use your limbs strength to maintain the balance and remain in the pose with five breath and it’s a final position of this pose.

(Don’t bend your knees, keep your legs and back straight and try to touch the shins with your forehead).

Benefits of Upward Facing Intense Stretch

  • This Yoga pose strengthens your hip flexors and abdominals; lengthens your hamstrings also.
  • Beneficial in mild depression, stress and calms your mind.
  • Urdhva-Mukha Paschimottanasana stretches your legs, shoulders, and spine.
  • Improves your digestive system; stimulates your kidneys, ovaries, uterus, and liver.
  • Increases your appetite, cure general diseases and helps to reduce obesity.
  • Upward Facing Intense Stretch Pose Lengthens your leg muscles intensely.
  • Relieves in back aches, it tones your internal organs.
  • Upward Facing Intense Stretch Pose Improves your concentration level.

NOTE

In the case of a knee injury, back injury and in hamstrings don’t perform this stance. This is a very intense leg stretching pose; so it’s important to practice the basic leg stretching Yoga Pose first. Benefits take time and need daily practices, therefore you have to practice daily for benefits

#never gives up keep trying#

The post Urdhva-Mukha Paschimottanasana (Upward Facing Intense Stretch Yoga Pose) appeared first on Sarvyoga| yoga online|yoga.

Why Should We Practice Yoga daily?

$
0
0

Many people ask us, why the daily practice of yoga poses or yogic activities is important and what its benefits. So in this section, we briefly mention the daily benefits of yoga. First of all, don’t take Yoga as just a physical exercise; it’s a lifestyle of living healthy and happier life. Its works and effect on physical, mental and spiritual levels. Most of the people want immediate benefits by yoga, which is totally false thinking. If you really want its benefits then you have to practice Yoga daily in a correct way. If you are a learner then start with basic posture, when you are a master in this then go for next level. Try to perform yogic activities in the morning time with an empty stomach, if you have a hectic schedule then perform this in evening.

Keep in mind this line “Early to bed early to rise, makes a man healthy wealthy and wise”. This is a nursery rhyme but very true and effective.

There are so many plus points of the daily practice of yoga, here are some most common benefits are given below: –

  • Makes you feel happy and better

If you don’t believe then start doing yoga and feel it.

  • Increases flexibility

It is an important benefit of it. For gaining more flexibility you have to practice it regularly and consistently. But you have to be patient.

  • Improves Strength and Balance

Yoga is not a just doing bending and stretching, it also needs lots of physical and mental strength. Holding yoga poses and repetition increases your body strength as well as a brain. For holding yoga pose you have to maintain balance so by this you will increase your balance mentally and physically.

  • Reduces stress, depression, anxiety and hypertension.

  • It boosts your immune system.

  • Boosts your Focusing ability

Since your mind will be calmer and mess free it’s simpler to guide the vitality to where you need it to go. In yoga, you create one-sharpness fixation through practice. You prepare the brain to wind up noticeably mindful and display. Investigate has demonstrated that after a yoga class you are by and large better ready to center your mental assets, prepare data all the more precisely and furthermore learn, hold and refresh snippets of data all the more viably.

  • Increases your Metabolism.

  • It soothes your skin.

Yoga gives you time to know yourself

By practicing yoga you get a little time for yourself, and it is an important thing for those people who spend their time for caring their dear ones or those who are busy on the job. Giving your time to others is a precious aspect of your life and this helps you feel more connected to the people or worlds around you. For this you have to full first, means know you first (weak points, strength, capability) focus what is happening inside you. Knowing yourself is called “Pratyahara” which is known as the eighth limb of Yoga. If you really want to change the world then change yourself first.

  • Removes toxins from your body.

  • Makes your body aware. 

  • Lower down the symptoms of Lower back pain.

  • Makes your spine strong and flexible.

  • Kicked out common problems like a cough and cold, fever etc.

  • Beneficial in respiratory related problems like Asthma and other chronic diseases.

  • Boosts your energy level and lower down fatigue.

  • Beneficial in sleep disorders.

  • It helps to reduce weight and gaining weight also.

  • Calms and relax our body and mind.

So these are some plus points of yoga, hope you add yoga in your life as a lifestyle and get an answer why you should practice yoga daily.

Eat healthy live well and keep practicing Yoga daily.

The post Why Should We Practice Yoga daily? appeared first on Sarvyoga| yoga online|yoga.

How to cure constipation by Yog Asana and Pranayam

$
0
0

Constipation is the most common problem or issue in Today’s running life of every person. If you can’t get help for this problem at the right time or ignoring this problem, can cause big issues in the future. This can cure by yoga if you regularly perform yoga asana and Pranayama. Late night working, late meals, lack of exercise is, eating fast food is some common causes of Constipation.

Yoga is a characteristic approach to diminish and cure perpetual clogging (Constipation). Constipation can happen at any age. Babies, little children, kids, youngsters, grown-ups, older people, nearly everyone can be the contender for this problem. Constipation might be the main driver for some other digestive problems, for example, acidity, gas, ulcers, piles and so forth. When you get help for this issue, these other digestive issues additionally vanish.

what is constipation?

Not everyone has defecation every day. That propensity varies from individual to individual. Yet, when a man can’t “go” notwithstanding when he needs to, has torment, needs to strain in the can, it is constipation.

On the off chance that a man has excruciating, occasional solid discharge with hard stools, which would imply that individual, has the blockage. The state of having defecation less than three times each week is called constipation.

On the off chance that a man has this condition for 2-3 months or more, it is called severe constipation.

(In simple word, Constipation is a condition in which there is trouble in discharging the insides (Defecation), ordinarily connected with solidified excrement).

Symptoms of Constipation

There are many symptoms of constipation and they may vary according to individual’s age, bowel movement habits, and food habits and so on. Every one of the symptoms may not be present in every constipated individual.

Rare Bowel development, dry, hard and little stools, trouble and agony while passing the stool, need to strain in the toilet, grisly stool (stools with blood) and so on are symptoms of constipation. Indeed, even after defecation, you feel it is deficient.

some common symptoms of Constipation

  • Feels bad taste in the mouth.
  • Gas, indigestion and stomach bloating.
  • The coating on the tongue.
  • Dull skin and feeling of sickness.
  • Cramps in the lower abdomen.
  • Vomiting and Nausea.
  • Stink in the breath.
  • Stomach ache.
  • Loss of appetite.
  • Ulcer in the mouth.

Causes of Constipation

One main cause of constipation is the food moving slowly in the colon. The longer the digested food stays in the colon; it becomes dryer as water is removed from it. That is the reason for the stool getting hard. There are also other indirect constipation causes.

The inability to go to the toilet even when a person feels the urge because of many reasons such as toilet is not available at that moment or he is too busy or feels lazy to get up and go to the toilet. If that happens too frequently, constipation may be the result.

There are other reasons that can cause the dryness and the hardness of the matter in the colon.

  • Low fibre or no fibre diet,
  • Some Medicines
  • Old age
  • Dehydration
  • Bad food habits
  • Some conditions such as a stroke being habituated to taking laxatives Problems with the digestive system, colon or rectum etc.

Yog  for Constipation

You can rehearse the yoga postures offered beneath to get help from severe constipation. Yoga postures and in addition the pranayama (breathing methods) enhance the blood supply to your digestive and end framework (elimination organs) organs and empower them without creating any terrible reactions.

Do the simple yoga postures to start with. At that point proceed with what you are comfortable with and do home consistently. This yoga posture invigorates your stomach organs by enhancing the blood stream to them and urge them to work ordinarily.

Yoga Poses for Constipation

Pranayama for Constipation

(For these yoga stances and Pranayam to be compelling, they ought to be done consistently, ideally day by day. These postures won’t just alleviate constipation; they will enhance your processing and general wellbeing as well).

Alongside yoga, take after the eating routine recommendations given underneath for better and quicker results. The greater parts of the digestive issues are because of numerous reasons, for example, Unhealthy eating, defective eating routine and upsetting way of life.

Add or build the fibre in your eating routine by including more vegetables, natural products, entire grains and drink more water. Go to the toilet when you feel the desire. Try not to delay.

NOTE: – Please consult a doctor and Yoga expert.

Eat healthy live well and Keep practising”

The post How to cure constipation by Yog Asana and Pranayam appeared first on Sarvyoga| yoga online|yoga.


Astavakrasana (Eight Angle Pose)

$
0
0

Astavakrasana or Eight Angle Pose is dedicated to the well-known sage Ashtavakra. According to the Ancient story, Ashtavakra had displeased his father while he was in the womb, so he was cursed and was born curved in eight places.

In Astavakrasana Asta means eight, Vakra means to bend and the meaning of Asana is pose, seat or posture. While performing this Asana, your body looks like crooked same as Sage Ashtavakra, so that’s why this Asana named so. Astavakrasana is an intense arm balance pose with the twist. When you practice this Yoga pose, you should keep in your mind to let go of your limitations or weakness (Physically and mentally). Eight Angle Pose is a great way to build your equilibrium and stability while strengthening your wrists and arms.

Preparatory Yoga Poses: – Chaturanga Dandasana, Utthita Parsvakonasana, Uttanasana.

Follow – Up Yoga Poses: – Bhujapidasana, Dwi Pada Bhujasana.

Style of Asana: – Ashtanga yoga.

Level of Asana: Advanced

Steps of Eight Angle Pose(Astavakrasana)

  • First of all, sit down in the cross – legged position comfortably and your right knee should bend and keep the sole of the same foot (right) just near to your right hips/ buttock.
  • Keep your right arm thread underneath your right knee. Lift up your right foot’s sole off the floor, make your shin is parallel to the ground at this moment.
  • Now, try to bring right knee in the upward position as much as you can by your right arm. Your knee ought to be brought over the right shoulder.
  • After that, put your palms strongly on the floor, during this keep your left leg straight.
  • By using your palms and arms strength, lift up your body from the ground.
  • Once you raised left leg, bend the left leg, and try to hook the left ankle around your right leg.
  • At that time, keep your torso wider towards the forward direction in a way that it becomes parallel to the floor.
  • After that, put your both legs to come to the right side of your body.
  • Make sure to keep your both your legs straight.
  • Hold the position about 30 to 60 seconds with normal and even breathing.
  • Now, get your body down to the floor and repeat the same process on the alternative side.

(If you are uncomfortable in this pose then, Use a bolster to rest the bottom of your buttock and your outer legs.)

Benefits of the Eight Angle Pose

  • If you really want to make your arms and wrists strong, then this is best for you.
  • Astavakrasana stretches your legs and arms.
  • Strengthens and tones your abdominal muscles.
  • Eight Angle Pose Improves your digestive system.
  • Boosts your concentration and balance. Calms your mind and kick out stress and anxiety.
  • Astavakrasana Beneficial in Menstrual disorders and menopausal symptoms.
  • This Yoga pose is challenging pose, by which it helps your body and mind to make a great connect.
  • The challenge of the pose helps the body and mind to build a great connect.

NOTE

Don’t perform this pose, if you have wrist, elbow or shoulder injuries. stavakrasana is very intense so practice preparatory poses, follow- ups poses and forward bending Asana before performing this pose. Don’t push your limit during asana, do as much as you can. Performing Asana in a right manner is very essential for every learner. So, perform all the yogic activities in under the supervision of an expert trainer/teacher.

(Love all the Human Beings and Animals; Keep practicing Yoga)

The post Astavakrasana (Eight Angle Pose) appeared first on Sarvyoga| yoga online|yoga.

Eka Hasta Bhujasana | Elephant’s trunk pose

$
0
0

Eka Hasta Bhujasana is coming under the intermediate level means medium level. This Name has come from Sanskrit, in which Eka means one, single; Hasta stands for the hand; Bhuja represents the arm, hand, bending and Elephant trunk. In Elephant’s trunk pose (Eka Hasta Bhujasana), you put your leg on to your arms or shoulder and your body look same as an elephant trunk, so that’s why this asana named so and this Yoga Pose is also known as one leg over arm/shoulder. Elephant’s trunk pose is a little bit challenging and good for your hand, arms and wrists. Before performing this Yoga pose you should practice all the Follow-up and preparatory poses first, after that go for Eka Hasta Bhujasana.

The level of Asana: – Intermediate.

Focusing Point: – Muladhara chakra (The Root Chakra)

Another Name: – Elephant’s Trunk Pose

PreparatoryYoga Poses:

Staff Pose (Dandasana), Chaturanga Dandasana, Double pigeon pose, Paripurna Navasana (Full Boat Pose) Sukhasana, Marichyasana, Parivrtta Surya Yantrasana High Lunge, Ardha Matseyendrasana.

Follow-Up Yoga Poses:

 Janu Sirasana, Pigeon Pose, Savasana, Astavakrasana.

Steps of Elephant’s Pose

  • First, come into the Dandasana (Staff Pose). From this Yoga pose lift up your right knee to your (towards your) chest (In this, you have to only lift up your knee but rest of your foot ought to be on the floor).
  • Now, keep your right arm under the right knee and put your hand on the floor. At that time your fingers are pointing in forwarding direction.
  • After that, keep your left hand on the ground, little outside from your left hip.
  • Raise your right leg up on your right arm (until your right knee comes to the right-hand triceps).
  • During this bend your right knee.
  • Now, gently press your hands and try to raise your body from the ground.
  • Remain in this position for 30 to 60 seconds or as much as you can hold.
  • Discharge your pose, and comes to initial position rest for some time and repeat the same process with your other leg. Try to practice Elephant’s trunk pose twice with your both legs this will give you best result.

Yoga Tips for Beginner’s

You find some difficulties in Eka Hasta Bhujasana (Elephant’s trunk pose). So increase your strength and flexibility by practicing some basic asana before performing Eka Hasta Bhujasana like (Utthan Pristhasana (Lizard pose), Dhanurasana, and Surya Namaskar)

Benefits of Ek Hasta Bhujasana

  • Eka Hasta Bhujasana strengthens your arms, wrists, and shoulders.
  • This Yoga Pose opens your hips and stabilizes pelvic girdle.
  • It makes your core stronger, improves your coordination and balance.
  • Elephant’s trunk pose Boosts your endurance and improves your focus.

NOTE: –

In a case of hip, shoulder or wrist injuries avoid this pose. Eka Hasta Bhujasana (Elephant’s trunk pose) is an intense arm balancing pose that needs your palms strength. So use your all four corners of your palms to avoid serious wrist injuries. All the Yogic activities need supervision of an expert person, so it is strictly advised performs all the asana under the correct guidance to avoid injuries. Don’t put on jeans or tight clothes during performing the asana; wear comfortable and loose clothes. Take a 3 to 4-hour gap between your meal and practice. Benefits require practice so practice daily for best results.

(One World One Love)

The post Eka Hasta Bhujasana | Elephant’s trunk pose appeared first on Sarvyoga| yoga online|yoga.

Parivrtta Ustrasana | Revolved Camel Pose

$
0
0

Parivrtta Ustrasana is a variation of Ustrasana and this is an intermediate backbend pose and targets your shoulders, quads and very good chest opener. The word Ustrasana is coming from the Sanskrit word. In which Parivrtta means turned around, revolved or twisted; Ustra stands for camel and the meaning of Asana is Pose, posture or seat.

According to the text of Asana, it is believed that; Parivrtta Ustrasana opens three chakras (Energy centers in the body) which are mentioned above. Anahata chakra is associated with compassion, forgiveness, and love. Sahasrara and Visuddha are well known as spiritual chakras. Activating Visuddha is associated with authentic expression, higher communication and the highest truth of Yogi’s and Sahasrara is belongs to the source of enlightenment and divine.

Level of Asana: – Intermediate

English Name: – Revolved Camel Pose

Focusing Chakra: – The Crown chakra (Sahasrara), the heart chakra (Anahata), The Throat Chakra (Visuddha) 

Steps of Parivrtta Ustrasana (Revolved Camel Pose)

  • First come into the Virasana (Hero Pose), with bend knees underneath you. Now, take your hands to your soles of your feet.
  • Breathe out and raise your pelvis up and far from your feet, as you move your upper body forward tuck your tailbone.
  • Keep your upper legs straight (perpendicular) to the ground.
  • Put your shins and feet strongly rooted on the floor or mat. Keep your both hands firmly gripped on the feet.
  • After that, pull up your navel as you lift and you feel arch is forming naturally by your back.
  • You should keep a strong hold by right hand on your right feet; slowly try to lift your left arm up towards the roof or ceiling.
  • Draw through the arm and out of the fingertips; try to reaching up without raising your hips, feet or legs. When you lift, your body slightly bends, at that point keep your hips square as you try to align your shoulders upwards.
  • Remain in this pose around 30 to 60 seconds with your eyes focusing up at the left thumb.
  • Breathe out and puts down your arms back to your feet and repeat the same process with your other arm. After that return to your initial position.

(If your muscles are tight then this Yoga pose is too difficult for you, in this condition try to keep your hands on the floor or mat instead of the feet. You can also lower down your pelvis little bit. Place a folded blanket under your knees for reducing the pressure of the weight on your knees)

Benefits of Parivrtta Ustrasana| Revolved Camel Pose

  • Revolved Camel Pose stimulates your digestive organs and improves your posture.
  • Beneficial in menstrual discomfort and in mild back pain also.
  • Helpful in asthma and other general problems of the respiratory system.
  • Calms your mind and reducing anxiety, fatigue, and stress.
  • Parivrtta Ustrasana stretches and strengthens your hip flexors, shoulders, abs, Quads, ankle, and groin.

NOTE

If you have the recent knee injury and in the case of hypertension avoid this Yoga pose. In migraines or insomnia don’t practice this. An incorrect practice of Parivrtta Ustrasana can cause neck or back injury, so it is strictly advised that perform the asana in the correct manner and in front of an expert.

(Don’t be feel lazy get-up and start practicing Yoga)

The post Parivrtta Ustrasana | Revolved Camel Pose appeared first on Sarvyoga| yoga online|yoga.

Parivrtta Surya Yantrasana (The Compass Yoga Pose)

$
0
0

Parivrtta Surya Yantrasana is a seated Yoga pose and it is an intense asana coz it stretches out your hamstrings and opens up your shoulders. It is performed by advanced practitioners because Compass Pose is a very challenging Yoga pose. Parivrtta Surya Yantrasana needs patience and reverence. Before performing this pose, your body needs a good warm up (warm up of hamstrings, groin, hips, spine, and shoulders). Before trying this Yoga pose, practice some warm up Asana such as Surya Namaskar then go for this Yoga pose. Without warming up your body don’t attempt this Asana.

In this Parivrtta means revolved, turned around; Surya represents the solar, sun; Yantra stands for device or instrument and the meaning of Asana is seat, pose or posture. When you perform Compass Pose, your body looks like an instrument same as Compass, so that’s why this asana named so.

Preparatory Yoga Poses: – Janu Sirasana, Uttanasana, Prasarita Padottanasana

Follow up Yoga Poses: – Parivrtta Janu Sirasana

Another Name: – The Compass Pose

Level of Asana: – Advanced

Steps of Parivrtta Surya Yantrasana

  • First, sit in the Dandasana (Staff pose) keep your spine erect. Now slightly rotate your left leg in an outward direction and bend your left knee, Keep the sole of your left foot to the inner right thigh.
  • With your left leg pressed against the ground or floor and pointing your knee outwards the left.
  • Breathe out and pull your right foot towards the groin.
  • Bend your right knee directly up. After that, place your right knee inward and hold (same like a hug) it near to your chest.
  • Breathe In, raise your right foot up by your left hand, when you turn the leg in an outward direction in a way the back of the leg faces out toward the right.
  • During this, keep your right arm around the outside of your right leg and under the knee, putting the right fingertips on the ground or floor.
  • Raise and extend your right leg, bring your right knee high up to your right shoulder.
  • Place your left hand on the outside of your right foot. Pull your left arm back behind your head during you straighten your leg.
  • Now slowly open up your shoulders, twisting your torso gently to the left. Lift up by the spine as you leaning back little toward your lifted leg.
  • Keep your most of the body weight on your right hand and right hip bone. Slowly raise your head without compressing your neck and look up to your left elbow.
  • Remain in this Yoga pose and keep normal breathing about 30 to 60 seconds if possible.
  • For discharging the pose, release your left hand from the right foot, untwisting your body when you lower your leg down and get back into the position of Dandasana, relax for few seconds. And repeat the same steps with your opposite leg.

(This Yoga pose is an advanced pose and needs lots of strength and flexibility in hamstrings. So try to lift and hold your leg as much as you are comfortable. May be you are unsuccessful in the first time, not to worry about this; with daily practice will make you better and better day by day. As we mentioned earlier, body warm up is essential for this, so precede the pose with good warm-up Asana like Sun Salutation (Surya Namaskar). Use a yoga strap for knee support and breathing properly during the Asana).

Benefits of the Compass Pose (Parivrtta Surya Yantrasana)

  • Parivrtta Surya Yantrasana stretches out the groin, shoulders, spine, and hamstrings and opens up your hips.
  • Right execution the Asana may stretch the tissue of the lung meridian which is good for respiratory organs.
  • Strengthens your spine, lower back, and limbs along with improves the flexibility of your muscle.
  • Compass Pose Improves your digestion and cleanses your digestive organs.
  • Parivrtta Surya Yantrasana is beneficial for your liver and kidneys.
  • Improves muscle flexibility.

NOTE

Avoid Parivrtta Surya Yantrasana (The Compass Pose), in back, neck or knee injury. Don’t go beyond over your capabilities. Breathe deeply in each step.

(Yoga not costs you but gives you a lot)

The post Parivrtta Surya Yantrasana (The Compass Yoga Pose) appeared first on Sarvyoga| yoga online|yoga.

Urdhva Anjaneyasana (Upward Crescent Moon Pose)

$
0
0

Urdhva Anjaneyasana comes under the basic level of Asana and it is performed in standing position. This Yoga pose targets your shoulders and the lower back. The word Urdhva Anjaneyasana is taken from the Sanskrit word, in which Urdhva means – Elevated, up, erects; Anjaneya is the name of Lord Hanuman and Anjana is the mother of Lord Hanuman and the meaning of Asana is Pose, seat or Posture.

Lord Hanuman is the most powerful, strongest, intelligent character in the Epic of Ramayana. We can say that this Yoga pose is inspired by Hanuman. And that’s why this Asana named so; this Asana is also known by the name of Upward Crescent Moon Pose.

Urdhva Anjaneyasana (Upward Crescent Moon Pose) is a Very easy and simple Asana for all age group of people.

Level of Asana: – Basic

English Name: – Upward Crescent Moon Pose

Steps of Urdhva Anjaneyasana (Upward Crescent Moon Pose)

  • First, come into the position of Tadasana (Mountain Pose), step your left foot about 2 feet back and raise the heel of your left foot. At this time, your both feet should be facing forward.
  • Raise your hands to your chest with palms pressing together like Anjali Mudra.
  • Now gently take your hands up towards the ceiling and your palms are joining each other (Namaskar or Anjali Mudra) and take deep breaths.
  • At this point, Visualize lengthening your spine in the upward direction along with tailbone towards the ground.
  • Make sure to keep your shoulders little down to make a space between your ears and arms.
  • When you reaching by your fingers, embrace (hug) your shoulder blades in towards your back to help stop your shoulders from moving in the direction (towards) of your neck.
  • Keep going on to actively reach up with your arms and by your pinky-sides of your hands.
  • Slowly try to arch your back to form a shape of crescent through your upper body along with your left leg.
  • Don’t take this Yoga pose as a deep backbend, so keep in mind not to bend too much, coz this can be injured you or put the strain on your lower back.
  • After that, gently tilt your head back without pressing your neck and look towards the ceiling.
  • Remain in this position about 30 to 60 seconds and keep controlled breathing.
  • For releasing the pose, keep your spine straight and put your hands down to your sides. Repeat the same steps with your other leg.

Benefits of Urdhva Anjaneyasana Pose

  • Upward Crescent Moon Pose improves your posture and beneficial in back pain.
  • It stretches and strengthens your shoulders, lower back, hamstrings, calves, chest, and ankles.
  • Urdhva Anjaneyasana Calms your mind and keeps stress away from your mind.

NOTE

If you are suffering from hypertension or any type of heart problems. Keep deep breathing in each step. In the case of Shoulder pain than putting your arms slightly parallel to each other instead of keeping the palms together in Namaskar/ Anjali mudra. In the condition of neck pain, don’t tilt your head back, but keep it straight.

(Love yoga and feel the difference in your life)

The post Urdhva Anjaneyasana (Upward Crescent Moon Pose) appeared first on Sarvyoga| yoga online|yoga.

Sucirandhrasana (Eye of the Needle pose)

$
0
0

This Yoga pose is a supine pose (Lying down) that targets hamstrings and your inner thighs. Best ideal pose for beginners. The Word Sucirandhrasana is taken from Sanskrit. In this, Suci= Needle, Randhra = Loop or hole and Asana means pose, seat or posture. In needle, there is a loop or hole for passing the thread, when you perform this asana you have to pass your hands through the space between your knees. So, this Asana is named as Sucirandhrasana (Eye of the Needle Pose).

The level of Asana: – Basic.

Another Name: – Eye of the Needle pose,  Dead Pigeon pose, Knee to Ankle pose, Reclining one- legged Pigeon pose.

Focusing Chakra: – The Heart Chakra (Anahata)

Steps of Sucirandhrasana (Eye of the Needle Pose)

  • First, start the pose by taking the position of Savasana (Corpse Pose). Keep your arms in resting position to your sides.
  • After that, bend your knees, and keep the soles of your feet flat on the ground or floor.
  • Now, separate your feet in a way that they are wide apart from your hips. Keep your thighs parallel to each other.
  • Next step, straighten and raise your left leg along with extending your heel to the ceiling.
  • After that, bend your left knee and cross fold your left ankle over your right knee. Bring your left outer ankle to the outside of your right knee in a way that your foot hovers in the air.
  • Next, keep your left foot flex, by pressing through your heel at the same time pull your toes back toward the left.
  • During breathe out; put your right knee close to your chest. Now, slide your left hand and forearm by the space between your legs. Clasp your both hands around the back of your right leg’s thigh (You may hold your shin).
  • At this time, your back should be flat on the floor or mat. Discharge your shoulder blades down toward your waist and broaden across your collarbones.
  • Keep your sacrum and tailbone down towards the floor and lengthen your spine.
  • Contact your chin gently and keep your eyes down to the center line of your body. Remain in the pose about one minute and breathe evenly and smoothly.
  • Breathe out and discharge your leg and keep your right foot on the ground. Raise your left leg straight up to the roof again, and after that bend your knee and put your left foot on the ground.
  • Repeat the same steps with your opposite leg.

(You can use yoga strap if you are not able to clasp your hands around your thighs.)

Benefits of the Sucirandhrasana

  • Eye of the Needle pose is beneficial in stress, anxiety, and depression.
  • Stretches and strengthen your hamstring, lower back, and inner thighs.
  • Sucirandhrasana Relaxes and clams your mind.

NOTE

Don’t perform Eye of the Needle pose in the hip, knee, spinal or lower back injury. Pregnant women avoid this Yoga pose. You have to breathe deeply in each step. During the process, don’t lift your tailbone, shoulders, and buttocks from the floor.

(Life gives you only one chance)

The post Sucirandhrasana (Eye of the Needle pose) appeared first on Sarvyoga| yoga online|yoga.

Urdhva Prasarita Eka Padasana | Standing Split Pose

$
0
0

This Yoga pose is the standing split pose, which tones your body. In yoga, split is used for giving you a good stretch. Before Practicing this Asana, you have good flexibility in your legs, neck, and back. The word Urdhva Prasarita Eka Padasana is coming from Sanskrit. In this, Urdhva= Elevated, upright, erect. Prasarita= Spread stretched out, expand or extend. Eka= One, single. Pada= Foot and the meaning of Asana is pose, seat or posture.

Another Name: – Standing Split Pose

Level of Asana: – Intermediate

Preparatory Poses: – Padangusthasana, Prasarita Padottanasana, Uttanasana, Janu Sirsasana, Paschimottanasana, Adho Mukha Svanasana, Supta Padangusthasana

Follow Up Poses: – Bhujangasana (Cobra Pose)

Focusing Chakra: – The Wisdom Chakra (Manipura chakra)

Steps of Urdhva Prasarita Eka Padasana

  • First of all, Lift your left arm up along with expands your right leg. Bend your torso towards the right when you breathe out. After that raise your left leg off to the floor (into the air).
  • After that, gently lean forward and move your torso to your right thigh. Keep your hands in resting position on the floor to manage the body weight.
  • Now, gently shift your body weight on your right leg while you are straightening left leg over your crown (head).
  • Note that, you have to rotate your hip joint and leg in a right way during performing this Asana.
  • Make sure that, you should keep your pelvis parallel to the ground; so that it may want to tilt towards the left for balancing your weight.
  • During the process, keep your both legs and knees erect, both of your knee caps facing straight direction. For keeping the lifted leg straight in the air you should push your chest towards the standing leg. Once you maintain the flexibility clasp your standing leg on the floor. Your torso descends your leg will ascend.
  • Hold the position about 30 to 60 seconds. Gently breathe out and slowly put down your leg on the floor and get back to the standing position.
  • Imitate the same process with your opposite leg.

(Beginner may use the support of wall for assisting lifted leg. Relax your neck and gaze towards your knee and keep in mind that not to strain your back. Raise your leg as much as you can).

Benefits of Standing split Pose

  • Standing Split Pose improves your balance stimulates your kidneys and liver.
  • Urdhva Prasarita Eka Padasana Give relief in Fatigue, headache, anxiety, mild depression, and insomnia.
  • Improves your focusing power. Stretches and strengthens your hamstrings, calves, quads, and groin.
  • Remove the tension from your cervical spine and good Yoga pose for your spine also.

NOTE

High or low blood pressure person, first concern your doctor. Avoid Urdhva Prasarita Eka Padasana (Standing Split Pose), in a migraine, low back pain, hip injury, ankle also in knee and shoulder injury. Take deep breathing during each step. Immediately don’t press or push yourself for performing the full standing split. Put on comfortable clothing before practicing any asana. Try to practice Pranayama and meditation after the asana.

(Hypertension kills our youngsters; so follow the healthy life style)

The post Urdhva Prasarita Eka Padasana | Standing Split Pose appeared first on Sarvyoga| yoga online|yoga.


Lighten Your Mind and Body – Aerial Yoga Demystified

$
0
0

Whether you’re a hardcore fan of yoga, or just starting out on your fitness journey, you should definitely give aerial yoga a try. Aerial yoga can be much more effective and calming than other conventional forms of exercise.

In aerial yoga, your routine revolves around a soft fabric hammock. This is a long piece of material made out of a high-density nylon fabric that is capable of supporting over 2,000 pounds. These hammocks are held in place by webbing straps, carabiners, and support chains. The height of the hammock can be adjusted according to personal preference.

Each session of aerial yoga involves executing various adaptations of traditional yoga poses. The poses are modified to be performed in the air, using the hammock for support. The exercise can vary from simple poses involving stretches while sitting on the hammock to balancing upside down while holding onto your feet for support.

Benefits of Aerial Yoga

In addition to the benefits of regular yoga, aerial yoga offers some additional positives:

Muscle strengthening: Since you need to work against gravity to perform the aerial yoga poses, your muscles tend to work harder. As you need to engage your core muscles to stabilize and balance yourself, it is also a great core workout.

Enhanced focus: The poses in aerial yoga force you to be more alert and aware of your surroundings as they are more challenging. Since your body is not accustomed to being suspended in the air, you are also likely to focus and concentrate more on getting the poses right.

Better flexibility: Aerial Yoga has a tremendous effect on improving your flexibility. This is because it gives more freedom of movement and you can move your body into positions that you never believed were possible. Therefore, the stretch you get is deeper than what traditional yoga poses give you.

Mood enhancement: Aerial yoga is an excellent way to relieve stress. In addition to traditional yoga poses that have mood altering properties, you also get to experience a feeling of lightness and flexibility like never before. This sense of novelty and excitement can make you feel on top of the world.

Risks Associated with Aerial Yoga

As in the case of any form of physical exercise, aerial yoga poses some risks of injury.  If you suffer from heart disease, low or high blood pressure, arthritis or glaucoma, aerial yoga may not be the right fit for you. People with a propensity towards motion sickness or dizziness may also have problems with the poses that involve hanging upside down. The same goes for people with balance issues as they may feel uneasy and unstable. Aerial yoga is not recommended for pregnant women and anyone who is recovering from surgery.

Tips To Keep In Mind When Performing Aerial Yoga

  • It is recommended to eat something light before attending an aerial yoga class, as performing these poses on an empty stomach can leave you feeling lightheaded. However, avoid consuming a heavy meal at least two hours beforehand.
  • It is important to stay hydrated before, during and after a session. This will help prevent headaches and extreme dizziness.
  • Wear the appropriate clothing to stay cool and comfortable. Light, breathable fabrics, and fitted clothes are ideal. Opt for a fitted t-shirt or tuck your t-shirt into your pants to avoid any distractions when performing the inverted poses. Also, file your nails and keep calluses buffed. While the hammocks are made from durable materials that won’t tear easily, it can be annoying when your hand and feet snag on the fabric.
  • Like many other forms of yoga, aerial yoga is done barefoot. So there’s no need for shoes. However, it’s a good idea to carry a yoga mat, so that you will have something to stand on when not performing the aerial poses.
  • You can still give aerial yoga a try if you have joint or limb issues. Since the hammock supports a significant amount of body weight during poses, the pressure on your joints is alleviated. However, if you have other health issues such as high blood pressure or are pregnant, you may need to give aerial yoga a miss. Always consult a medical professional before starting, especially if you’re prone to vertigo or inner ear issues.
  • Before joining a class, check reviews and talk to people taking the class. Make sure your instructor is competent, formally trained and certified in aerial yoga instruction.

Final Thoughts

If you’ve always wanted to explore a feeling of weightlessness, aerial yoga is a great option. In beginner classes, the hammocks are only a few inches above the floor, so the risk of injury is minimal. As with any other form of physical exercise, always start slow and move at your own pace. Not only will aerial yoga leave you feeling charged with excitement, you’ll also get all the health benefits that come with it.

The post Lighten Your Mind and Body – Aerial Yoga Demystified appeared first on Sarvyoga| yoga online|yoga.

Parivrtta Parighasana | Revolving Beam Yoga Pose

$
0
0

Parivrtta Parighasana is a backbend pose; which targets your chest and shoulders and comes under the intermediate level. In this, Parivrtta means revolved, turned around and Parigha stands for the iron beam or iron bar used for shutting a gate. This Yoga pose is a variation of Parighasana. This Yoga Pose is also known as Revolving beam pose.

Another Name: – Revolving Beam Yoga Pose.

Level of Asana: – Intermediate

Focusing Chakra: – The Crown Chakra (Sahasrara), the heart Chakra (Anahata), The Throat chakra (Visuddha)

Steps of Parivrtta Parighasana (Revolving Beam Yoga Pose)

  • Start the pose by kneeling down position and keep your knees width apart from hips. Stretch your spine upward and pull your tailbone in the direction of your abdomen.
  • After that, you have to keep your quads at the angle of 90 degrees (perpendicular) to the ground. Now, press your shins and feet tops into the floor or ground.
  • Breathe out and keep your upper body slowly in the back direction. Put your left hand outside of your left ankle with fingers aiming back same as the direction of your toes.
  • With your palm press the floor and spread out your fingers. In case, if you are uncomfortable; you may lower down your hips area towards your heels.
  • Press your left hand against the floor and lift your right knee and stretch it in forwarding direction with making an angle of 45 degrees away from your body.
  • Completely straighten your leg and pressing the sole of your foot towards the floor. Lift up come forward at the pelvis to keep you left thigh perpendicular to the ground. Now, keep your left arm straight without locking your elbow.
  • Raise your rib cage up in the direction of the ceiling. Make an arch by your back to curve your spine. Stretch right arm up over the head; keep extending it back to maintain the curve of the spine.
  • Remain in the position for 30 to 60 seconds and breathe deeply. After that, lower your raised arm and bend your right knee, placing it back towards the left and lift the torso up for returning to your initial position. Perform the same procedure with your other leg and hand also.

Benefits of the Parivrtta Parighasana

  • Revolving Beam Yoga Pose stretches and strengthens your hamstrings, quads, shoulders and lower back.
  • Parivrtta Parighasana opens your chest and increases the capacity of your lung.
  • This Yoga pose is beneficial in the mild back pain.
  • Calms your mind, kick out anxiety, stress, fatigue, and depression.

NOTE

Deep breathily during the process; place a folded blanket under your knee if you have some pain in the knee. Don’t performParivrtta Parighasana in the case of serious knee pain, wrist injury, and shoulders pain. Perform all the activities under the supervision of an expert perform.

The post Parivrtta Parighasana | Revolving Beam Yoga Pose appeared first on Sarvyoga| yoga online|yoga.

Yoga Mudras – Miracle of Fingers Gesture

$
0
0

As you know that, our body is made up of five elements which are – Fire, Air, Space (Sky or Aakash in Hindi), Earth and water. The whole universe is constituted of these five elements. These are very important elements for the earth and for us. Mudra has its own importance in yoga and it is an important part of Yoga. There are many kinds of Mudra but in this section, we will discuss Hand Mudra (Hasta Mudra).

Hasta means Hand and the meaning of Mudras are postures or special gesture form by fingers. Mudras are the refined form of Asanas. Mudra is correct and scientific yogic functions through which an individual can make or change, individual’s internal and external frame of mind i.e. Mental (emotional disturbance, intelligence, anger etc.), spiritual (Meditation, concentration), Physical (In different diseases and illnesses). In our body Thumb and Fingers represents the five elements which are given below:

Five fingers and Five Elements

  • Thumb: – It represents the Fire (Positive element), Fire is important for us, it heats the substance, strengthens the body through digesting the food. Maintains flexibility of muscles and healthy skin and stimulates hunger and thirst.
  • Index Finger: – It represents the Air element (Positive element); it controls the function of the heart, circulation of blood. It maintains balance, strengthens our lungs, downward movement of urine and stool along with moves phlegm and bile.
  • Middle Finger: – It represents the Space (Negative element); it creates pain and leads to heart attack, fainting, and paralysis. In order that air circulates and maintains the right balance, there has to be space and space cause blockage which is fatal.
  • Ring finger: – It represents the element Earth (Neutral element); a Physical structure of the body like blood, flesh, and bones etc.
  • Little finger (Pinky finger): – Water is the element for this finger (Negative element); in our body, more than 70% of water is present or in a simple word our body is composed of more than seventy percent of water. It helps in removing toxins from our body by lymphatic glands.

In Modern science we all know that the substance or matter is formed by three general parts: – Electron (Negative energy), Proton (Positive energy) and Neutron (No charge or neutral). Same as modern science, these five elements have positive, negative and neutral energy.

The theory of Hasta Mudra (Hand gesture)

  • The whole universe is built up by five elements, Fire, Air, Space, Earth, and water. In our hand, five fingers stand for the five elements; which is described above.
  • If theses five elements are in balance then our body remains healthy and in the case of any disturbance in these elements, it results in diseases. Five elements are so important because; it controls the body parts and their functions along with internal glands also.
  • Modern science also confirms that around every tip of fingers there is a concentration of free electrons; when touched together the tips of the fingers to the other parts of our palms this Prana (free energy) is redirected back towards our by specified channels, back up to the brain. This redirected energy traveling by the nerves stimulates the different Chakras.
  • The tension applied to the nerves and the neural or psycho-neural circuits made by the Mudras helps in balancing the basic five elements. The redirection and the balancing of the tension of the internal energy effects the changes in tendons, sensory organs, veins, and glands, which helps to bring the body back to a healthy state.

Benefits of Mudras

  • Hand gesture adds peace and happiness to you and generates powers to provide development of your body and mind.
  • Mudra gives miraculous change and excellent improvement in your body.
  • It benefits you in all three states – Mentally, Physically and spiritually.
  • It provides instant relief for many diseases.
  • Some of them may balance the elements of the body within 45 minutes, and some of them are quick enough to act within a few seconds.

In this article, we discuss the most common and important Mudras; which are given below: –

  • Gyan Mudra (Mudra of Knowledge)

This is the most common mudra; perform this mudra when you are doing meditation.

Steps: – From your index finger tip touch the tip of your thumb and keep rest of fingers straight, free or slightly bent.

Benefits: – Improves your concentration. Boosts your brain power and make brain nerves strong. Helps to release stress and assists in meditation better.

  • Prana Mudra (Mudra of life)

Steps: – Sit in Lotus Pose (Padmasana) and bend your ring finger along with little finger and touch the tip of your thumb by these fingers tip and start meditation.

Benefits: – It is important mudra because it activates the energy in the body. Improves your eye sight and enhances body immunity. The body becomes energetic, active and healthy.

  • Udan Mudra

Steps: Sit in any meditative pose; bent your index, middle, ring finger and touch the tip of your thumb with these fingers tip.

Benefits: – Beneficial in stammer and defective speech. Good for your throat.

  • Vayu Mudra

Steps: – You can perform this mudra in a sitting, lying down or standing position. Bent your index finger and you can feel or see there are two bones in your fingers.  These bones are called phalanx. While you fold your index finger, press the second bone with the base of your thumb. Keep rest of three fingers straight as much as you can.

Benefits: – Beneficial in Vayu related problems like – arthritis, knee pain, gout, sciatica, joint pain, paralysis. It is helpful in spine pain and neck pain.

(If you get the benefits from this mudra, avoid this because, after a specific time, this may cause imbalance within your system).

  • Surya Mudra

Surya means Sun and it is a Sanskrit word and this mudra increase the fire element in the body; so this mudra is named so.

Steps: – You can perform this mudra in sitting or in standing position. Bend your ring finger in a way that the tip of your finger touches the mound of your thumb. Now by your thumb press your ring finger. Keep your other fingers straight. Do this around 15 minutes into three sessions.

Benefits: – Increases heat in the body which aids in proper digestion. It reduces weight and helpful in obesity and decreases the stress level. Enhance the body strength and reduces cholesterol in the blood. Beneficial in problems related to liver and in diabetes also.

  • Apana Mudra

Steps: – Bend your middle and ring finger and touch the tip of your thumb with these fingers tip. Do this mudra for 15 minutes into two or three sessions.

Benefits: – Beneficial in piles, constipation, diabetes, Vata –Dosha, urinary and kidney related problems. Good for your digestive system and gives energy to your body.

  • Varuna Mudra

Varuna means water; this word belongs to Sanskrit and it increases the water element in the body and this mudra named so

Steps: – Bend your little finger and touch the tip of your thumb with this finger tip.

Benefits:Makes your skin soft and shiny along with removes dryness of the body. Best for skin related problems and makes your face beautiful. It reduces the deficiency of the water element.

  • Apana Vayu Mudra

It is also an important and powerful mudra.

Steps: – Fold your index finger along with bends your middle and ring finger; now by the tip of your thumb touch the ring and middle fingers tip. Keep your index finger folded and your little finger pointing straight.

Benefits: – Makes your body healthier and helpful in Vata-dosa related problems also in heart problem. It is beneficial in a headache, high – blood pressure and in asthma also.

  • Linga Mudra

Steps: – Keep your both hands in the forward direction and interlock the fingers with each other in a way that your fingers are intertwined; at that time keep your left-hand thumb vertically in the upward direction and encircle it with your right thumb also with the right-hand index finger. Hold the poses about 15 minutes during this breathe in and breathe out normally.

Benefits: – It increases the heat level in the body; by this, dries excess phlegm. It is useful in a cough and cold, Asthma, sinusitis and in low blood pressure also.

  • Shunya Mudra

Shunya means zero in Sanskrit and it is also known as a gesture of emptiness.

Steps: – First bend your middle finger in a way that it touches the mound of your thumb. Now bend your thumb and press the first phalanx (first bone of your finger) of your middle finger with your thumb.

Benefits: – It is beneficial in an earache and other hearing related problems. This mudra is useful in deafness.

  • Prithvi Mudra (Mudra of Earth)

Steps: – Bend your ring finger and by the tip of your thumb touch the tip of your ring finger. Keep rest of your fingers straight.

Benefits: – It alleviates fatigue and makes your body stronger. Boost your self – confidence.

  • Aakash Mudra 

Steps: – Sit in Padmasana or any sitting pose; bend your middle finger and touch the tip of your thumb with the middle finger tip.

Benefits: – Increase the space element within the body. It replaced negative emotions (anger, sorrow, fear) by positive thoughts and emotions. This gesture gives the satisfaction of completeness.

NOTE

If you want best results to form Mudras; then perform this with the empty stomach. Try to perform mudra by your both hands about 15 minutes into the two or three sessions. Some Mudra produces heat, so in high blood pressure avoid this if you are felling not well. Avoid this in the case of indigestion, heartburn and in acidity also.

The post Yoga Mudras – Miracle of Fingers Gesture appeared first on Sarvyoga| yoga online|yoga.

How to Cure Blood Pressure

$
0
0

In this Article, we describe the main common causes of High and low B.P along with some important Asana and Pranayama which is beneficial in blood pressure problems. By the daily practices of these Asana & Pranayama you can manage/control your blood pressure. Yoga is one and only which gives you complete relaxation to your mind, body, and soul. Asana and Pranayama provide outstanding benefits in High blood pressure as well as in Low blood pressure.

Before discussing the Asana and Pranayama for Blood pressure, you have to understand the meaning of Blood Pressure.

What is blood pressure?

Blood pressure is a measurement which measures how hard the blood is pressing/ pushing against the walls of our arteries. During heart beats, heart pumps the blood and Arteries carry blood away from our heart to the body. When blood travels through the arteries, it presses opposing the walls of the arteries. In simple words, the force or strength of flowing blood through arteries is called blood pressure. If the flow of your blood through arteries is high then it may lead to heart problems and termed as high B.P. High blood pressure is the common cause of heart attack and blockages in arteries.

Blood pressure is generally measured in millimeters of mercury which is denoted as mmHg (mm = millimeters and Hg is the symbol of mercury). Friends, it’s enough for you to understand the blood pressure, if we go in detail then its turns our main topic. But we are trying to give all the important knowledge regarding blood pressure in a brief way.

The terminology of blood

The high blood pressure is known as Hypertension in medical term and low blood pressure is called Hypotension. You have noticed that in the reading of blood pressure there are two numbers for e.g. 120/80. In this, the top or first digit (120) is called the systolic pressure, and the bottom number (80) is known as the diastolic. This is the measurement of blood.

A pressure which is generated by each heartbeat is called Systolic pressure. This happens when our heart muscles contracts.

A pressure between the heartbeats when our heart is in resting state is called Diastolic blood pressure.

The main thing is systolic pressure is always higher than the diastolic blood pressure.

Blood pressure readings

The blood pressure reading chart is given below

  • (90/60) or less: – It indicates the low blood pressure.
  • Greater than (90/60) and less than (120/80): – This indicates the healthy and ideal blood pressure.
  • Greater than (120/80) and less than (140/90): – This is a normal reading of blood pressure but little higher than it should be, and try to lower it.
  • Higher than (140/90): – It mentions that you are having hypertension (high blood pressure). Consult a doctor and change your lifestyle, if your B.P. reading comes under this.

Common Causes of Low blood pressure(Hypotension)

  • During Pregnancy blood pressure is decreased but after delivery, it goes normal.
  • Problems of Thyroid.
  • If you have low blood sugar.
  • Most common cause is Heart problems.
  • Dehydration – Due to vomiting, diarrhea or by fever.
  • Disorder of Nervous system.
  • By Medication to treat the different disease or high blood pressure.

Cause of high blood pressure (hypertension)

  • Lack of exercise, consumption of alcohol and smoking.
  • Depression, Anxiety, and Stress.
  • Taking the high amount of salt in your meal.
  • Unsystematic lifestyle. Junk food is also common and weight gain.
  • Late night work.
  • Obesity is one of the most common causes of Hypertension.
  • Age – above 60 years of age the chances get increased to be affected by hypertension.

By performing Pranayama and Asana daily gives you outstanding benefits. Pranayama is the complete breathing technique which kicks out negativity from your mind and passes the positive energy. Here are some Pranayama and Asana are given below:-

Pranayama for Hypotension (Low blood pressure)

In low blood pressure don’t do Sheetali or Shitkaari Pranayama coz it’s lower down the body temperature and avoids this Pranayama in winter also.

Pranayama for Hypertension (high blood Pressure)

Avoid Kapalbhati and Bhastrika coz Its increases the body temperature.

Yoga Asana for Hypertension

In High, B.P. perform all the yogic activities slowly in a right way.

Yoga Asana for Hypotension

What are the Benefits of Yoga in Blood Pressure?

  • It controls your blood pressure and relaxes your mind, body, and soul.
  • Gives Relief in anxiety, stress, and depression.
  • Reduces the chance of heart attacks and strokes.
  • Calms your body, mind and boosts the concentration of the mind.
  • Kicks out toxins from your body cures insomnia and you gain positive energy from Asana and Pranayama.
  • Gives a willpower to control anger.
  • Increases your Immunity power and helps to manage your lifestyle.

How to manage and control Blood Pressure?

Don’t ignore your blood pressure readings whether it’s high or low. Here are some tips which are helpful in blood pressure.

  • First of all, avoid fast food; give up your drinking or smoking habits.
  • Take less amount of salt in your meal. Include more green vegetables and fruits in your eating menu.
  • An important thing, Practice yogic activities or any other exercises regularly.
  • Try to become more active and don’t be lazy. Do regular blood check up.
  • Try to make and maintain your systematic daily routine.
  • Avoid late night working. Keep an eye on your weight and control your anger also. Do not overdo any exercises in case of High blood pressure. If women having high B.P. then doesn’t practice these asanas during periods.

(It’s time to change your routine and embrace the yoga in your daily life)

The post How to Cure Blood Pressure appeared first on Sarvyoga| yoga online|yoga.

Top 5 Energy Boosting Health Tips Naturally

$
0
0

Did you ever found yourself surrounded by a myriad of thoughts? If yes, then it is very likely that your mind is pre-occupied with the stress and strains of the modern day living. You might be worried about the daily chores of life, from depositing the unpaid electric bills to prepare a report and the list goes on.

Besides after going through all these troubles, you boss also won’t be too impressed if he notices you with your back hunched down and your eyes drooping heavily. So here are some effective yet natural energy boosting health tips that will make you look tireless and energetic anywhere!

  • Focus on Inner Stillness and Stability

The stress induced emotions would compel your body to spend a massive amount of energy. There are various methods to suppress this and help you to focus on the inner stillness, calmness, stability as well. The most common tip and advice that every individual would give you is about doing meditation.

But there are some other effective ways available as well. These include talking with your heart’s content with your buddies, finding some other recreation, and lot more. This will help you to regain your calm nature and maintain the stability of your mind and brain.

  • Have an Aromatic Bath

If you are having a severe body pain, then probably an aromatic bath will make you more energetic. You can sprinkle a few drops of lavender oils with some rose water and any natural aromatherapy oil in your bathing water. You can also light some scented candles so that the entire atmosphere becomes scintillating with the scent along with the real feel of the spa.

You just need to lie back and enjoy the goodness along with the healing qualities of the aromatic oils. So soak and enjoy!

  • Dance

If you have tried every possible method and still it is not working, then you need to perform some dance steps for some period. Alternatively, if you are not aware of the steps of the dance forms, then simply you can try to stretch yourself a little bit. You can also perform some Zumba Cardio Fitness Steps so that it will make you perspire and make you more energetic than ever before.

You can also perform some warming up steps before you barge into the slimming world. This stretching exercise would be extra effective for the sympathetic nervous system. As a result, it will thoroughly energize your mind and body.

  • Try walking through a labyrinth

This is the best way to get revived in minutes. If you work for a 10-minute walk in a labyrinth, then your mind will get engaged again so that you won’t be able to heed any attention to the persisting pain. The more your mind remains engaged and busy, the happier you will be.

With this engagement, you will also be able to get a mini-vacation for your brain. So allow the maximum rest to your brain while engaging them to the fullest.

  • Relax & Sleep Thoroughly

“Early to Bed and Early to Rise

Makes a man healthy, wealthy, and wise.”

Benjamin Franklin

The above quote is correctly applied here. In today’s hectic era, where everyone is out for the cat race, no one cares about their health and sleep. They need to realize that human body needs a minimum of 6 – 8 hours to rest. The biological clock of ours is not habituated to work round-the-clock. So when you relax and sleep, you get your brain refreshed and would be more energetic the next hour.

Wrapping up

If you look at the above tips, there is none that you were aware of. But when it comes implementation, most of the individuals fail in the same. You need to stick with these daily routines and principles so that you always look fresh and lively.

Author bio:

Krima Flint is a Health and beauty addict who blogs also at Dealslands. She likes diet plans because it delivers portion-control food. Also Fitness conscious. She is a type of geek who loves to write beauty hacks and skin care tips also. Creating a vision for health-oriented beauty.

The post Top 5 Energy Boosting Health Tips Naturally appeared first on Sarvyoga| yoga online|yoga.

Viewing all 364 articles
Browse latest View live


Latest Images